

Nutrients are only part of the root-zone story
A soil can contain useful nutrients and still be a difficult place for roots. Water may drain so quickly through coarse sand that the upper root zone dries soon after irrigation. A dense or compacted layer may hold water at the surface while roots remain shallow and short of air. Both situations can produce weak crops, and neither is solved by adding fertiliser first.
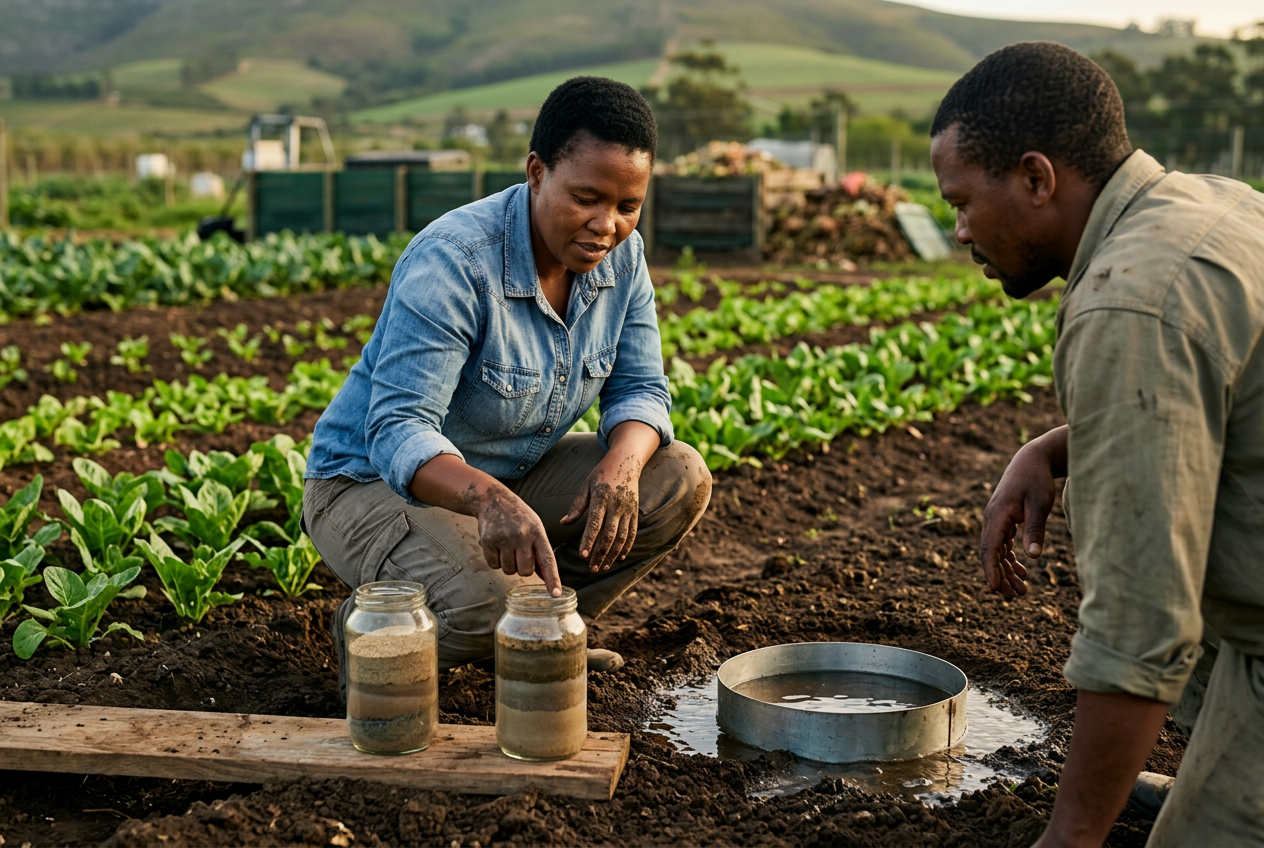
Two simple field exercises can improve your first design conversation: a jar test to estimate the soil's particle mix and an infiltration observation to see how water enters the ground at a particular place. They are not laboratory tests and they do not diagnose every drainage problem. Their purpose is to replace vague labels such as bad soil with observations you can use when discussing beds, organic matter, mulch and irrigation.
For site-specific design and implementation, explore sustainable growing-system design.
Texture, structure, compaction and drainage are different
Texture refers to the relative proportions of mineral particle sizes commonly grouped as sand, silt and clay. It changes very slowly. Structure describes how those particles, organic matter and biological activity form aggregates and pores. Structure can improve or deteriorate with management. Compaction is a loss of useful pore space caused by pressure or working soil under unsuitable conditions. Drainage is the result of several factors, including texture, structure, slope, soil depth, buried layers and where water arrives from.
This distinction prevents two common mistakes. First, adding a little sand to clay does not simply turn it into loam; inappropriate mixes can perform poorly. Second, a clayey soil is not automatically unusable. Its structure, drainage position, rooting depth and management determine what is practical. Likewise, sandy soil is not automatically well drained when a compacted or impermeable layer sits below it.
Use the field tests on a representative area that is safe to disturb. Avoid buried services, contaminated ground, waterlogged hazards and steep or unstable slopes. For significant drainage or structural work, obtain appropriate professional advice.
For the next practical decision, continue with send a representative soil sample to a laboratory.
For the next practical decision, continue with compare raised and in-ground beds.
For the next practical decision, continue with build a no-dig vegetable bed.
Test 1: the soil jar observation
- 01
Collect a representative sample
Take small amounts from several points in one similar zone. Exclude concentrated compost, fertiliser bands, rubble and unusual wet patches unless those are being investigated separately.
- 02
Prepare the soil
Air-dry if appropriate, break clods gently and remove stones, roots and undecomposed material. Do not grind mineral particles.
- 03
Fill a straight-sided jar
Add soil and clean water, leaving enough space to shake. Some protocols use a dispersing agent; follow a credible method consistently if you need a closer estimate.
- 04
Shake thoroughly
Seal the jar and agitate until aggregates are dispersed. Place it on a level surface where it will not be moved.
- 05
Observe settling
Larger particles settle sooner and very fine particles remain suspended longer. Mark visible boundaries only when they are reasonably clear. Organic fragments may float and should not be read as a mineral layer.
- 06
Treat the result as an estimate
Use it to frame questions, not to assign an exact laboratory texture class. Repeat unclear tests or request a suitable laboratory analysis.
Test 2: a simple infiltration observation
- 01
Choose a representative, level spot
Avoid cracks, animal holes, recent digging, a dripper outlet or the edge of a path. Record whether the soil is already very dry or wet.
- 02
Insert a ring carefully
Use a suitable open cylinder set into the soil far enough to limit obvious sideways escape at the surface. Do not damage known services.
- 03
Pre-wet when the selected protocol requires it
Very dry soil can behave differently during the first wetting. A consistent pre-wet step may make comparisons more useful.
- 04
Add a measured depth of water
Start the timer and observe how the level changes. Repeat according to the chosen method rather than relying on one dramatic pour.
- 05
Record behaviour, not only time
Note ponding, cracking, sideways flow, surface sealing and whether nearby water appears. Compare several points in the proposed area.
- 06
Investigate contradictions
Rapid entry at the surface does not prove deep drainage. Slow entry may reflect compaction or crusting rather than texture alone. A profile inspection or professional assessment may be needed.
Turn observations into better design questions
<p><em>The next action is often another observation or measurement, not an immediate amendment.</em></p>
| Observation | Possible design response to investigate | Do not assume |
|---|---|---|
| Coarse-feeling soil and rapid wetting | More frequent monitoring, surface cover, suitable organic-matter strategy and irrigation matched to root depth | That adding large amounts of compost or clay is automatically safe or economical |
| Fine soil with slow surface entry | Check compaction, crusting, slope, application rate and whether cycle-and-soak irrigation is appropriate | That texture alone proves permanent waterlogging |
| Water enters, then ponds later | Investigate a restrictive layer, shallow rock or incoming subsurface water | That raised beds alone solve the wider drainage route |
| Strong variation across the site | Create separate management or irrigation zones and sample them separately | That one jar or one ring represents the whole property |
| Good infiltration but plants still wilt | Check wetting depth, emitter distribution, root health, heat and crop stage | That visible surface wetness equals adequate root-zone water |
When to move beyond home tests
- The garden is a significant commercial, school, estate or community investment.
- Site history suggests dumping, industrial activity, ash, sewage, mining or contaminated fill.
- Drainage creates erosion, affects buildings or neighbours, or may involve a watercourse.
- Plant performance remains poor despite corrected irrigation and management.
- You need pH, nutrient, salinity or contamination information for an amendment decision.
- Results vary sharply over short distances or contradict the visible soil profile.

Design beds and water around the soil you have
Green Earth Concepts can assess soil behaviour, drainage, slope, available water, bed options and maintenance needs together. Bring your jar observations, infiltration notes, photographs and any laboratory results so the site conversation starts with evidence.
Read behaviour before choosing the bed
- A jar test gives an approximate texture picture; an infiltration test observes water entry at one place and time.
- Neither test replaces a representative laboratory analysis or professional drainage assessment when stakes are high.
- Texture, structure, compaction, depth and slope must be interpreted together.
- Avoid trying to transform soil texture with improvised mixtures; improve function through site-specific management.
- Use several observation points and keep clearly different zones separate.
A soil label is a starting point
Sand, silt and clay describe mineral particles; they do not tell the whole story of a growing bed. Roots experience pores, aggregates, temperature, moisture, compaction and drainage routes. Two simple tests help you notice that system.
Use the results to ask better questions: Should this area be a bed at all? Does irrigation need shorter cycles? Is incoming runoff the real problem? Would an in-ground, raised or hybrid approach be easier to maintain? Better questions protect the budget from quick fixes and make the next test or design decision more useful.